# 内容目录
- 使用 hexo 搭建自己的 Github Page 博客
- 设置自定义域名,并添加 https 保护
- 国内外分流访问
# 1. 使用 hexo 搭建 Github Page 博客
这部分工作主要参考的是 zjufangzh 的博客,链接地址为 https://blog.csdn.net/sinat_37781304/article/details/82729029
-
首先下载 hexo
hexo 官方网站 https://hexo.io/zh-cn/
1
2
3
4
npm install hexo-cli -g
# Linux npm 安装(如果没有)
sudo apt-get install nodejs
sudo apt-get install npm在合适的目录开始创建自己的博客
1
2
3
hexo init blog # 初始化名字为blog的博客
cd blog
npm install下载完成之后的目录
1
2
3
4
5
6
node_modules/ 依赖包
scaffolds/ 生成文章的模板
source/ 博客内容,主要为md文件
themes/ 博客主题
public/ 博客的发布页面
_config.yml 博客网站的配置文件运行
1
2
3
hexo clean # 清理之前的发布内容
hexo generate # 生成新的发布页面,命令可简写为hexo g
hexo server # 部署到本地localhost:4000,命令可简写为hexo s浏览器打开 http://localhost:4000 即可看到效果
-
博客部署到 Github Page 上
登录 github,创建一个新的 repository,名字为
username.github.io,例如我的 github 账户名为 snowroll,所以 repository 的名字为snowroll.github.io![]()
生成 ssh,添加到 github 中
打开 git bash(如没有,请自行查询下载)
1
2
3
git config --global user.name "yourname" # yourname为你的github用户名
git config --global user.email "youremail" # youremail为你的github对应的邮箱
ssh-keygen -t rsa -C "youremail" # -t 指定密钥类型,-C 公钥备注,一般写自己的邮箱 生成ssh,一路回车即可找到生成的
.ssh文件夹,打开1
2
3id_rsa # 私钥
id_rsa.pub # 公钥
known_hosts # 记录服务器端的Host,IP及rsa文件,作缓存用复制
id_rsa内的内容到剪切板,直接打开复制也可以1
pbcopy < ./id_rsa.pub # mac 系统下的命令行操作
打开 github 的个人设置中的 SSH and GPG keys,点击 New SSH key,将复制的内容粘贴进去即可
测试是否成功
1
ssh -T git@github.com
出现 You’ve successfully authenticated, but GitHub does not provide shell access. 提示即意味成功
生成 ssh key 的参考博客,https://blog.csdn.net/qq_36761831/article/details/88725670
将 hexo 与 GitHub 关联,修改
blog/下的_config.yml1
2
3
4deploy:
type: git
repo: https://github.com/yourgithubname/yourgithubname.github.io.git
branch: master注意在
:后要添加空格,github 貌似要改 master 分支为 main,到时候可能需要更改配置安装 deploy-git,以便将博客部署到 GitHub
1
npm install hexo-deployer-git --save
开始部署,更多命令请参考 https://hexo.io/zh-cn/docs/commands
1
2hexo clean
hexo d -g # d 部署 -g 部署之前预先生成静态文件成功之后,过一会就可以在 https://yourname.github.io 看到你的博客
-
更改主题,撰写文章
可以在 https://hexo.io/themes/ 下选择自己喜欢的主题,下载到
themes/目录下![]()
landscape是默认主题,yilia-plus是我下载添加的主题,项目地址 https://github.com/JoeyBling/hexo-theme-yilia-plus更改
blog/下的_config.yml1
theme: yilia-plus
重新部署即可生效,具体关于主题的各项设置,请参考各个主题的 github 项目说明文档
开始写文章
在
source/post下的添加.md 文件即可,或者1
hexo new paper
更多详细操作参考 https://hexo.io/zh-cn/docs/writing 和 https://blog.csdn.net/sinat_37781304/article/details/82729029
Tips: yilia-plus 配置 search 功能,在博客根目录下执行
npm i hexo-generator-json-content --save, 在_config.yml中添加相关配置
# 2. 设置自定义域名,添加 https 保护
-
设置自定义域名
在阿里云上购买一个域名,看个人需求,我购买了 snowroll.top 域名 (目前已失效),主要是便宜 hhhhh。阿里云域名购买及解析教程链接 https://developer.aliyun.com/article/767435
上面链接的域名操作的 “解析设置” 里,添加一条记录
1
2
3
4记录类型: CNAME
主机记录: @
解析线路:默认
记录值: yourname.github.io这条解析记录应该是将你申请的域名解析关联到 yourname.github.io,再通过 github 自己的 dns 服务器进行解析(个人理解,没有实际抓包看过)
为了让域名生效,还得在
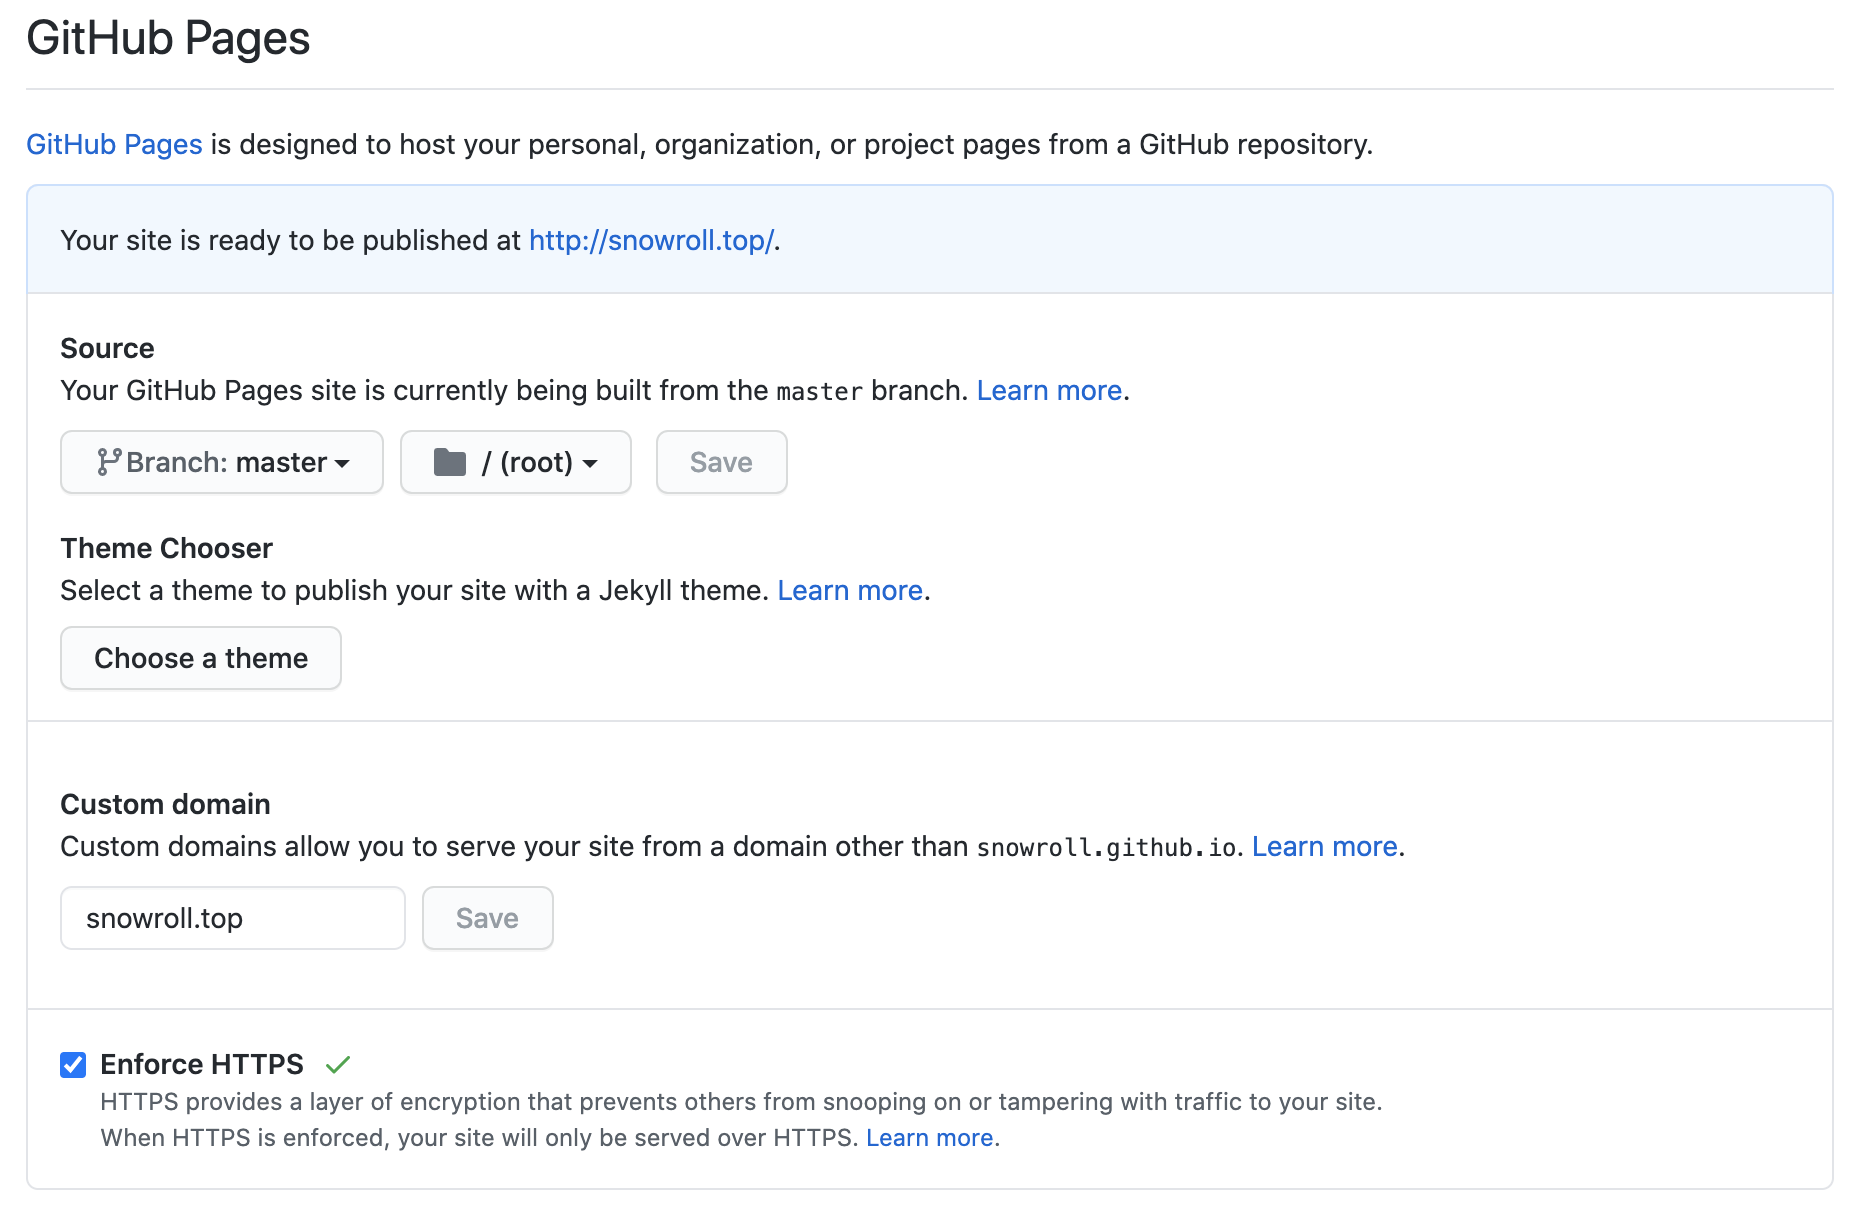
yourname.github.io仓库的 setting 中,设置自定义的 Custom domain,示例如下![]()
未添加 https 保护时,图中的 Enforce HTTPS 无法选中,也只能通过 http 访问自定义域名
为了防止自定义域名失效,在
blog的source/下新建CNAME文件,里面填上你的自定义域名即可1
snowroll.top
可以重新部署,查看一下自己的域名是否生效(重新部署后,可能需要 1-2 分钟页面才能更新)
-
添加 https 保护
为了给自定义的域名,也添加 https 保护。我们在阿里云上申请一个免费的证书,教程链接 https://developer.aliyun.com/article/715576
签发完成并进行完相关的设置后,可能需要 1-2 小时 https 保护才能生效,所以不用过于着急。
至此,就可以开始愉快的写博客了。
# 3. 国内外分流访问
-
参考博客: https://asurada.zone/post/Deploy-Hexoblog-To-Codingnet-And-GitHub/
这篇博客讲解的很全面,按步骤走就可以。其中有些坑,我罗列在下面供大家参考
-
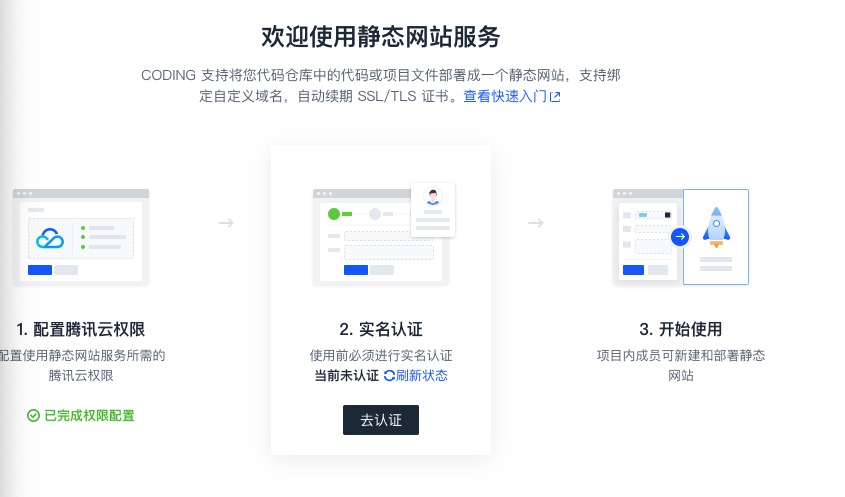
使用 coding 部署静态网站一直无法认证成功?
A: 认证的腾讯云必须和 coding 是绑定的关系,实名认证之后才可以
![]()
在「个人设置」-「登录密码:前往腾讯云查看并更改」中进行绑定认证
-
上述博客最后有一个 coding 开启 https 的功能,新版申请自定义域名后,证书认证通过后自动为 https,无需强制开启
-
# 4. 问题汇总及解决
-
撰写文章,上传到 github 会导致图片丢失,不可见
解决:
-
方案 1: 进行文件资源引用,官方文档 https://hexo.io/zh-cn/docs/asset-folders
-
方案 2: 在
source/下建一个images目录,将图片放入其中,文档中图片的引用统一为格式
-
-
如何新建文件夹,不止是在
source/_post/下解决:
hexo new page test会生成source/test/文件夹,但这个无法再test下加其他 md 文件,无法识别 -
如何让点击完之后的网页直接在当前网页跳转,而不是打开多个网页?
更改主题中_config.yml 中的 open_in_new: 均改为 false 即可
-
添加代码块复制功能
参考文章 https://codeantenna.com/a/pvakwyOYZ0
上述文章针对的是
yilia主题,所以迁移到yilia-plus需要做少许改动-
利用 js 实现代码拷贝功能
在
hexo的根目录themes\yilia-plus\source\lib中新建clipboard_use.js,如下:1
2
3
4
5
6
7
8
9
10
11
12
13
14
15
16
17
18
19
20
21
22
23
24
25
26
27
28
29
30
31
32
33$(".highlight").wrap("<div class='code-wrapper' style='position:relative'></div>");
/*页面载入完成后,创建复制按钮*/
!function (e, t, a) {
/* code */
var initCopyCode = function () {
var copyHtml = '';
copyHtml += '<button class="btn-copy" data-clipboard-snippet="">';
copyHtml += ' <i class="fa fa-clipboard"></i><span>复制</span>';
copyHtml += '</button>';
$(".highlight .code").before(copyHtml);
var clipboard = new ClipboardJS('.btn-copy', {
target: function (trigger) {
return trigger.nextElementSibling;
}
});
clipboard.on('success', function (e) {
e.trigger.innerHTML = "<i class='fa fa-clipboard'></i><span>复制成功</span>"
setTimeout(function () {
e.trigger.innerHTML = "<i class='fa fa-clipboard'></i><span>复制</span>"
}, 1000)
e.clearSelection();
});
clipboard.on('error', function (e) {
e.trigger.innerHTML = "<i class='fa fa-clipboard'></i><span>复制失败</span>"
setTimeout(function () {
e.trigger.innerHTML = "<i class='fa fa-clipboard'></i><span>复制</span>"
}, 1000)
e.clearSelection();
});
}
initCopyCode();
}(window, document); -
引入相关 js 文件
在
hexo的根目录下的themes\yilia-plus\layout\layout.ejs文件的</body>前引入(不是<body>,自己弄的时候犯蠢,结果调试了好久)1
2
3
4<!-- 代码块复制功能, 引入jQuery和clipboard -->
<script type="text/javascript" src="https://cdn.jsdelivr.net/npm/clipboard@2.0.4/dist/clipboard.js"></script>
<script type="text/javascript" src="https://apps.bdimg.com/libs/jquery/2.1.4/jquery.min.js"></script>
<script type="text/javascript" src="<%- url_for('lib/clipboard_use.js') %>"></script> -
添加样式
修改
hexo的根目录下的themes\yilia-plus\source\main.a5fda8.css,在末尾添加以下样式1
2
3
4
5
6
7
8
9
10
11
12
13
14
15
16
17
18
19
20
21
22
23
24
25
26
27
28
29
30
31
32
33.btn-copy {
display: inline-block;
cursor: pointer;
background-color: #eee;
background-image: linear-gradient(#fcfcfc, #eee);
border: 1px solid #d5d5d5;
border-radius: 3px;
-webkit-user-select: none;
-moz-user-select: none;
-ms-user-select: none;
user-select: none;
-webkit-appearance: none;
font-size: 13px;
font-weight: 700;
line-height: 20px;
color: #333;
-webkit-transition: opacity .3s ease-in-out;
-o-transition: opacity .3s ease-in-out;
transition: opacity .3s ease-in-out;
padding: 2px 6px;
position: absolute;
right: 5px;
top: 5px;
opacity: 0;
}
.btn-copy span {
margin-left: 5px
}
.code-wrapper:hover .btn-copy {
opacity: 1;
}
-


